View Cameras
Not too many photographers start with a 4x5" view camera, but that is rather a shame. View cameras are the most flexible cameras, usually made from a basic design that has not changed for over 100 years. You know the guy in the old time photo studio who photographs with his head under a cloth? He's using a view camera. Ansel Adams? He took most of his best photos with a huge 8x10" view camera. All those luscious ads for food in magazines? Taken with view cameras.
A view camera is fundamentally a light-tight box with a slot at one end for a lens and a slot at the other for the film. You compose and focus your image on a groundglass, then displace the glass with a sheet of film four by five inches in size. That's right, the negative from a view camera is about the same size as a proof print that you get back from a 1-Hour lab.
I tried several times to teach a very intelligent friend how to use my Nikon 8008. Despite the camera's marvelous user interface and available automation, she simply couldn't remember what all the different controls were for. However, she had no trouble understanding my SINAR monorail view camera, an enormous contraption that intimidates 99% of experienced amateurs. That's because a view camera's controls are simple, direct, and physical.
Another advantage of having used a view camera is that it gives you an understanding of perspective. With a view camera, the lens and film aren't fixed parallel to each other. This opens up a huge range of creative opportunities that are unavailable to most users of 35mm and medium format gear. For example, if you want to take a photo of a building with a Nikon, you have to point the camera up towards the sky. You will then be projecting the vertical exterior of the building onto the angled film surface. The lines of the building will converge towards the top of the frame. With a view camera, you shift the lens up and/or the film down. The film is now "looking up" at the building through the lens, but the film is still parallel to the building exterior so lines don't converge.
A used view camera outfit will cost you about $500. I prefer metal cameras such as Calumet, Cambo, Linhof, and Sinar. All view cameras work the same way. What you pay for in a more expensive camera is the assurance that when the controls are zeroed, everything is in fact parallel and you'll get a sharp picture. My friend Elsa has a beautiful Deardorff wooden view camera that we tried to use to copy her 20x24" Polaroid originals. In theory this should yield high-quality images. In practice, it does not. I measured the camera with the indispensable Zig-Align mirrors (available from zigalign@compuserve.com for about $50) and discovered that the lensboard and film back were not anywhere near parallel. Nor could they be reliably kept parallel so we scrapped the idea and substituted an old metal camera instead.
If you're ready to buy a view camera, read "Choosing a Large Format Camera" and then View Camera Technique.
At right: the very first image that I made with a view camera, back in 1981. I was a 17-year-old undergraduate at MIT taking an intro photography course (the only one I've ever taken). We had old cheap metal view cameras, loaded Tri-X, and developed the film and prints ourselves.
What Camera Should I Buy? (Organized by Camera Type)
Posted by Ermasari Susanti | 1:28 AM | Lensa Camera | 0 comments »Making Being Blur Background
Posted by Ermasari Susanti | 4:11 PM | Being Blur Background | 0 comments »
Here I will tell you a little about making the background a blur, and for friends who are still confused beginner who wants to make the background into blur can simply see here and maybe for friends who have advanced about sebaganiya arrange photos andthese are things trivial but for the beginner this might be useful.
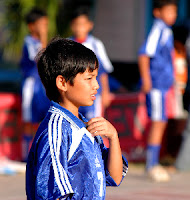
Step One: Set your zoom to the maximum point
For example, if you have a lens 18-55m, then set your lens to 55mm zoom. If you have any telephoto zoom lens, such as 55-250mm, it's even better. Use of this lens andzoom lens set to 85mm to 135mm you. Focal Range is ideal for portrait photos.
Step Two: Put your model as far as possible from the background
The farther the distance between the background with the model than the distance tothe camera model, the more blur the background of the camera.
Step Three: Set the aperture / aperture your lens as big as possible
 The bigger the aperture the more blurry the background, if you have 18-55mm f/3.5-5.6lens. So, set your aperture to f/5.6 (this is the maximum aperture at 55mm focal range.
If you are not satisfied with the results of 18-55mm lens, I recommend to buy a 50mm lens 85mm f/1.8 or f/1.8. Although the lens can not zoom, but very large maximumaperture, making it more suitable for portrait photos.
Understanding Learning Mode Nikon Speedlite - TTL and TTL - BL
Posted by Ermasari Susanti | 3:11 PM | nikon | 0 comments »After identifying a few lenses that have been in their posts and use a camera that fits in now learn to understand the mode Nikon Speedlite - TTL and TTL-BL and the popularity of studying these differences are also very important because everything relating to working way you who want to become a photography, it never hurts read a little article is to add your insights about the world jour photography.
TTL (Through the lens) the way it works is the camera measures the quantity of light required to illuminate the subject of the picture automatically through the lens. That necessitated by this mode is the main subject (which is in focus) light. This mode does not take into account the background lighting.
TTL-BL (Through the lens - Balance) take into account all parts of the picture, both the main subject, as well as background from side to side, top bottom. After measuringeverything, the new camera and flash to determine the best settings so that the background and the subject of the picture balanced lighting.
If the background is brighter than the subject of the photo, the flash will give off light with a large quantity so that images look the same subject with a bright background.
Conversely, if the dark more photos subject of subject of the picture, the flash will give off light with a small quantity, so that offset the background. If your camera mode in the form of auto or semi auto (Aperture priority (Av / A) or Shutter priority (S / Sv)), then the camera will automatically balance the lighting between the flash and camera settings. The result is photographs that seem more natural and less plasticity that youuse the flash because the flash of light and the background has been mixed. After identifying a few lenses that have been in their posts and use a camera that fits in now learn to understand the mode Nikon Speed lite - TTL and TTL-BL and the popularity of studying these differences are also very important because everything relating to working way you who want to become a photography, it never hurts read a little article is to add your insights about the world jour photography.
Subscribe to:
Comments (Atom)